Friday, December 31, 2010

Let's bring the SU! love back to Splitcoast!!


"Everything that's old is new again"  -- PattyB  

Originally designed for SU! demos to keep in contact and inspire each other, Splitcoast became the #1 site for stamping.  As time went on and Splitcoast evolved, the papercrafting industry became more and more prominent.  Splitcoast Stampers, the community that was built upon Stampin' Up!, spread its wings to include companies offering different papercrafting products.    

Soon it began to seem like there was less and less SU! product visible within the community so the idea of developing challenges and "Wicked Wow" just for SU! demo's was born. Unfortunately, while this continued to populate the demo areas it was doing nothing to help the overall image of SU! throughout the entire Splitcoast community. SCS community members that were not SU! demo's continued to be tantalized by the smorgasbord of delights offered by other companies.

Thus the evolution of this revolution! There is a phrase "Everything that's old becomes new again" so this revolution went back to the beginning! A crew of SU demo's  -- the Creative Crew! -- were picked to develop projects each month that are primarily Stampin' Up! Projects that we want to WOW people, to INSPIRE people, to show the whole SCS community that Stampin' Up! also has a smorgasbord of ideas and products available to them.

Every month, there will be four challenges that can be done either Stampin' Up! only  (SUO) or with 95% SU! products (SUM) in four focus categories:  


Catalog Focus
DSP/Color Focus
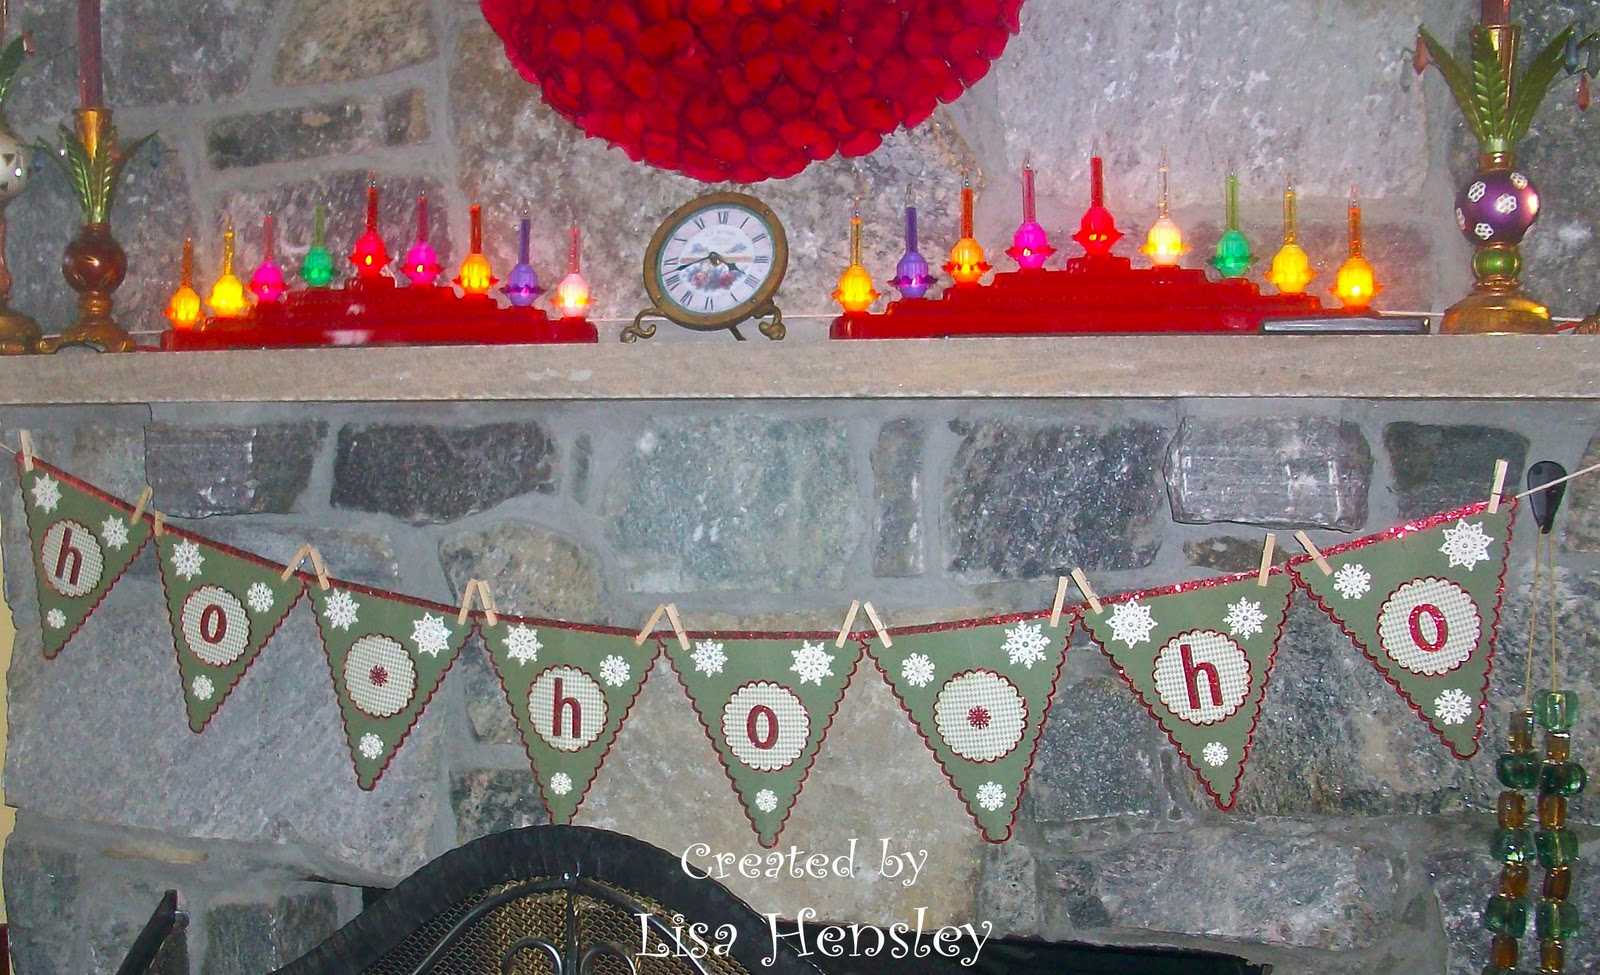
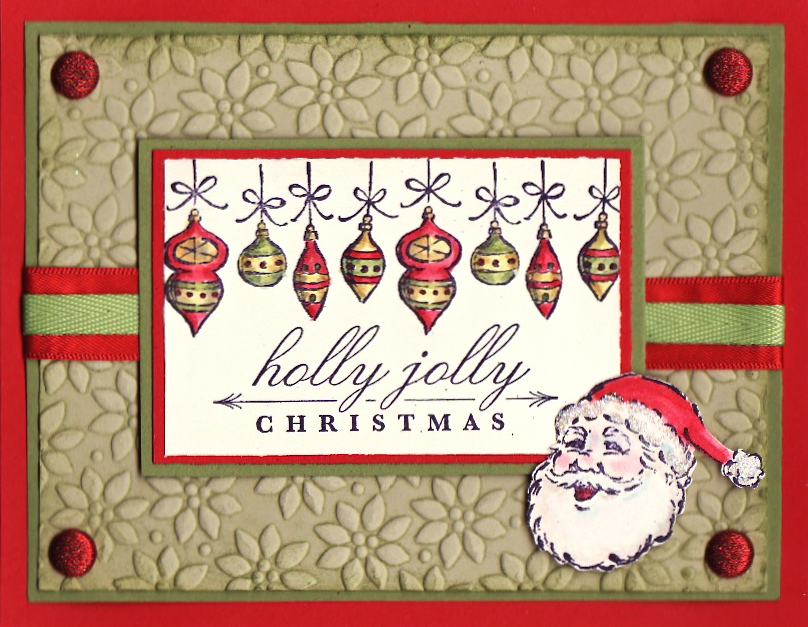
Holiday/Seasonal Focus
Scrapbook Inspiration Focus


All of the Crew design team members are Stampin' Up! demo's, but the creations inspired by the challenges each month are for the entire SCS community. We encourage demo's and non-demo's alike to play along, be inspired, and "TO SHARE WHAT YOU LOVE!"


After noon CST on January 1st, follow the blinkie badge at the right, straight into the brand, spankin' new Creative Crew gallery at Splitcoast Stampers!  Feel free to put the blinkie on your own blogs and spread the word!

Thursday, December 30, 2010

Get the latest issue of the Paper Crafter's Sampler, "With Love..."

Get set to kick off the new 2011 year with Paper Crafters Sampler starting with our January issue, "With Love...".  This issue is dedicated to the upcoming season of love.  Available January 11th!  The projects are fabulous and should give you so many great ideas to use for Valentines Day!


Remember to use the code PCS-LH when you subscribe!


Sunday, December 19, 2010

Festive Holiday Banner!


I got a wild urge the other day to dig out my BigZ XL Pennant die and try to work up a festive holiday banner for my mantle and this is what I ended up with!  I had no idea what I wanted to say, the colors I wanted to use, or anything else other than that I wanted to use those cute little clothespins that I'd picked up at Michaels.

I cut the Pennants out of Always Artichoke card stock, then cut the border scallops out of Cherry Cobbler and layered them behind the Always Artichoke pennant.  I ran some Tombo adhesive around the scallops and coated them with red glitter.  I also added a piece of Sticky Strip across the top of each pennant and coated with more red glitter.


The central medallions were cut using the larger of the Circles, Scallops #2 out of a sheet from the Holiday Treasures dsp.  I cut additional scallop circles out of Cherry Cobbler to layer behind the houndstooth scallop circles.  Again, I ran liquid Tombo around the outside of the scallop borders and dusted with red glitter.  The HoHoHo letters were cut out of red Glimmer Paper with the BigZ Alphabet Simple Letters and shadowed with another cut out of Chocolate Chip card stock.  Snowflakes were cut out of Vanilla card stock using the Northern Frost decorative strip.  I adhered them and used some Dazzling Diamonds glitter in the "holes" of the snowflakes.

Paper:  Always Artichoke, Cherry Cobbler, Vanilla, Chocolate Chip, Holiday Treasures dsp

Ink:  Always Artichoke

Accessories:  Big Shot, BigZ XL Pennant die, BigZ Circles Scallop #2 die, Northern Frost decorative strip, BigZ Alphabet Simple Letters dies, Martha Stewart red tinsel glitter, mini-clothespins, natural cord. Dazzling Diamonds glitter, Sticky Strip, Dimensionals


Tuesday, December 14, 2010

CC300 - Splitcoast Stampers Celebration of Colors Challenge


I did this for the Celebration of Colors challenge this week. My color combination was CC294 -- Baja Breeze, Blushing Bride and Crumb Cake. Personally, I would've never come up with this color combination on my own -- I would've gone to Chocolate Chip instead of Crumb Cake, but it gives the combination a light touch.

I had fun with the new Build a Blossom set and the coordinating punch -- I see a lot of possibilities with this! I stamped the petal in Blushing Bride on BB cardstock. After I punched them out, I glittered the edges with Dazzling Diamonds.

Stamps: Build a Blossom, Clearly for You

Paper: Baja Breeze, Blushing Bride, Crumb Cake, White, DS Paper Patterns Pack - In Color

Ink: Chocolate Chip, Blushing Bride

Accessories: Big Shot, Framed Tulips Textured Impressions Folder, Build a Blossom punch, extra large Scallop Oval punch, large Oval punch, 1/16" round punch, neutrals brads, Baja Breeze corduroy buttons

Monday, December 13, 2010

Lovely Windowpane


Here's my first project using the new SU! Beveled Windowpanes!

 layered Marina Mist, Always Artichoke and patterns from the Springtime Vintage dsp. The flamingo image was stamped onto Vanilla, watercolored, then matted with Always Artichoke. I cut slots for the Always Artichoke seam binding with a crafters' blade, then fed the seam binding through the slots in the large beveled windowpane and behind the image. I used a couple of mini-glue dots under where the seam binding covers to secure the cs to the beveled windowpane.

Stamps: Clearly for You

Paper: Marina Mist, Always Artichoke, Vanilla, Springtime Vintage ds

Ink: Black, Baja Breeze, Not Quite Navy, Pear Pizzazz, Always Artichoke, Pretty in Pink, Regal Rose

Accessories: Beveled Windowpane, Basic pearls, Marina Mist 1/8" taffeta ribbon, Always Artichoke seam binding, Dimensionals, Aquapainter, Exacto knife, mini-glue dots, Ticket-Corner punch

Sunday, December 12, 2010

Buttons on a Card


Ever since I saw the Sweet Buttons embosslit, I've been wanting to do buttons on the button card from Sew Suite! This is the first result -- and I'm sure that there will be others.

I layered Tangerine Tango, Poppy Parade and Pear Pizzazz. The buttons card from Sew Suite was stamped in Poppy Parade, then overstamped with Versamark and clear embossed. The Top Note layer was cut from the Sew Suite fabric.

Stamps: Sew Suite

Paper: Tangerine Tango, Poppy Parade, Pear Pizzazz, White

Ink: Poppy Parade

Accessories: Big Shot, Sweet Buttons embosslit, Top Note die, Square Lattice Textured Impressions folder, Subtles brads, Poppy Parade stitched ribbon, Sew Suite fabric, Sizzix adhesive sheets, Dimensionals, pinking shears, needle and white thread

Wednesday, December 8, 2010

SU Creative Crew!


I am so happy to announce that I've been chosen to be part of the Stampin' Up! Creative Crew on Splitcoast Stampers!

The SU Creative Crew is basically going to showcase Stampin' Up! products. Starting on January 1, all demos will be invited to participate in the challenges and upload their work into a public gallery on Splitcoast.  It's going to be very like the Fan Club, but you do not have to pay to see it!

Here is a list of my fellow team members.  You can click on their names to see their fabulous blogs!


I would like to thank Jana (indyemmert), Susie Nelson, Patty (pattyb) and Lydia (Understandblue) for allowing me this opportunity.

Saturday, December 4, 2010

Botanical Gazette


This came out a bit darker/differently than I wanted. I went to spritz the finished central layer with Log Cabin Smooch Spritz and it came out too heavy on the left side. It was too much work, so I'll have to live with the result!  I tried to balance out the heavy spritz with a little more color, but I think that it came out looking a little to contrived.  Better luck next time!

That central layer was a sheet of notebook paper from the Botanical Gazette ds. I sponged Close to Cocoa and Chocolate Chip on the "flat" side of the Framed Tulips Textured Impressions folder and ran the piece of ds through the Big Shot. Afterwards, I lightly watercolored the tulips and frame with a wash of Not Quite Navy.


Stamps: Nature Walk, Winter Post


Paper: Not Quite Navy, Early Espresso, Botanical Gazette ds


Ink: Early Espresso, Crumb Cake, Chocolate Chip, Not Quite Navy


Accessories: Big Shot, Framed Tulips Textured Impressions folder, Early Espresso 5/8" satin ribbon, metallic brads, sponge, Aquapainter, Dimensionals, Log Cabin Smooch Spritz


Friday, December 3, 2010

New Springtime Vintage suite from Stampin' Up!


I layered Rose Red, Not Quite Navy, Vanilla and a sheet from the Springtime Vintage ds. The Vanilla layer was color embossed with a very light sponging of Baja Breeze ink around the tulip edge, then run through the Big Shot in the new Framed Tulips folder -- which I totally adore!! The Rose Red frame was stamped in Vanilla craft ink and clear embossed.  I cut out two additional frames and offset them behind the Rose Red frame to give it a little more depth.

Stamps: Baby Blossoms

Paper: Rose Red, Not Quite Navy, Vanilla, Springtime Vintage dsp

Ink: Craft: Vanilla. Classic inks: Pear Pizzazz, Not Quite Navy, Always Artichoke, Baja Breeze

Accessories: Big Shot, Framed Tulips Textured Impressions folder, Adornments, Basic Pearls, sponges, Rose Red seam binding, lace trim, Dimensionals, mini glue dots, clear ep

Thursday, December 2, 2010

Sew Suite from the new SU! Occasions Mini!


I love the new pompom trim! Its pretty flat and the pompoms are close together, so it's easy to work with. The row of pins are from the rub-ons and the tape measure is from Sew Suite.  I see lots of possibilities with the pieces of this new suite!


Stamps: Sew Suite, Picnic Parade


Paper: Melon Mambo, Daffodil Delight, Tangerine Tango, White


Ink: Black, Tangerine Tango, Melon Mambo


Accessories: Sweet Stitches rub-ons, Tangerine Tango pompom trim, Sweet Stitches big designer buttons, white thread, brights brads,dimensionals, aquapainter

Splitcoast Stampers WICKED challenge for November! WKD1110A & WKD1110B


Here is my submissions for this months' Wicked challenge. I did the first two parts of the challenge -- a square card and the color challenge (Rich Razzleberry, Pear Pizzazz and Tempting Turquoise). Not a color combination that I would naturally think of, but I think that it came up really nice!  I do like the look and symmetry of square cards -- I think that I need to do more of these.  Go here to look at the WICKED Challenge Gallery at Splitcoast Stampers!


Stamps: Merry Crittermas


Paper: Rich Razzleberry, Pear Pizzazz, Tempting Turquoise, Vanilla


Ink: Black, Pear Pizzazz, Garden Green, Regal Rose, Rich Razzleberry, Daffodil Delight


Accessories: Big Shot, Perfect Polka Dots Textured Impressions folder, Bigz Scallop Square Duo die, Glitter Brights brads, Pear Pizzazz 1/2" stitched-poly ribbon, Rich Razzleberry 1/8" taffeta ribbon, Dimensionals, Aquapainter, 3/4" square punch

Wednesday, December 1, 2010

Splitcoast Stampers Color Challenge CC299


I did this card for the newest SCS color challenge, CC299 -- Red Old Rock. I have to say that I would've never, ever put together Real Red, Old Olive and River Rock, but I love it now!  That's the great thing about the color challenges -- they force me to think out of the box.

I love the ornaments on this card -- they remind me of those retro Christopher Radko Shiney Brite ornaments.  I've got old Shiney Brite ornaments from both of my grandmothers.  I love adding the new ones to my collection!

The River Rock layer was color embossed by running it through the Petals-a-Plenty folder, inked with Old Olive.


Stamps: Holiday Heritage, Bright Christmas


Paper: Real Red, Old Olive, River Rock, Vanilla


Ink: Craft ink: White. Classic inks: Black, Blush Blossom, Regal Rose, Riding Hood Red, Cherry Cobbler, Daffodil Delight, More Mustard, Old Olive, Always Artichoke


Accessories: Big Shot, Petals-a-Plenty Textured Impressions folder, Glimmer Brights brads, Real Red 5/8" satin ribbon, Old Olive 1/4" twill ribbon, Dazzling Diamonds glitter, white gel pen, Dimensionals, Aquapainter

Tuesday, November 30, 2010

Splitcoast Stampers Color Challenge CC298


This week's Splitcoast Color Challenge was Chocolate Cherry Crumb Cake -- go HERE to view the challenge thread and link up to the gallery!  True to the challenge, I layered Cherry Cobbler, Chocolate Chip and Crumb Cake -- only I picked up the Crumb Cake from the Deck the Halls dsp.   I really liked that Crumb Cake ds layer with the Always Artichoke/Cherry Cobbler garland -- I thought that it gave me both the color and a wonderful pattern to play off of for the peeling wallpaper background.


The central image was overstamped with Canvas in Crumb Cake and sponged around the edges with Crumb Cake and Chocolate Chip.  The lettering was done with an ombre watercolor in Daffodil Delight, More Mustard, Close to Cocoa and Chocolate Chip.


Stamps: Christmas Postcard, Winter Post, Canvas

Paper: Cherry Cobbler, Chocolate Chip, Vanilla, Deck the Halls dsp

Ink: Black, Crumb Cake, Close to Cocoa, Chocolate Chip, Daffodil Delight, Regal Rose, Riding Hood Red, Cherry Cobbler, Old Olive, Always Artichoke, Blush Blossom

Accessories: Ticket-Corner punch, Build a Brad, Dimensionals, Metallic brads, Cherry Cobbler seam binding, Early Espresso 1/8" taffeta ribbon, Always Artichoke seam binding, metallic brads, Aquapainter, Dimensionals, sponges

Monday, November 22, 2010

Northern Flurry


I definitely had a hard time giving birth to this card! I had a hard time figuring out how to do the sentiment without making the card too heavy -- I was aiming for something lighter and more ethereal.  I upped the contrast of the photo to show the detail.  It's very lovely, IRL.


I layered Blushing Bride, Regal Rose and Shimmer White. I sponged some Blushing Bride ink onto the Northern Flurry folder before I put in the Shimmer White, then ran it through the Big Shot. The snowflakes are highlighted with Basic Pearls jewels.


Stamps: Bells & Boughs

Paper: Blushing Bride, Regal Rose, Shimmer White


Ink: Blushing Bride, Regal Rose


Accessories: Big Shot, Northern Flurry Textured Impressions folder, Northern Frost decorative strip die, Basic Pearls jewels, Dimensionals, White organza ribbon, Scallop Trim border and corner punches, sponges


Friday, November 19, 2010

Kitty Khorus


I layered Early Espresso, Daffodil Delight and Cherry Cobbler. The Cherry Cobbler layer was run through the Big Shot using the Perfect Polka Dots Textured Impressions folder. The two front cats were cut out and popped-up on Dimensionals. Shadows were watercolored under and to the right of each cat with Crumb Cake.

What's funny about this card is that I thought that it was pretty basic -- simple, clean lines, easy to put together and not a distressed corner in sight.  Over on Splitcoast Stampers  this card has pulled 10 comments so far!  So many cards are like giving birth, trying to get them finished -- it goes to show that simplicity counts, too!!

Stamps: Merry Chrittermas

Paper: Early Espresso, Daffodil Delight, Cherry Cobbler, White

Ink: Black, More Mustard, Close to Cocoa, Chocolate Chip, Crumb Cake, Riding Hood Red, Cherry Cobbler, Regal Rose, Always Artichoke


Accessories: Big Shot, Perfect Polka Dots Textured Impressions folder, Subtles brads, Dotted Scallop Ribbon punch, 1/8" Early Espresso taffeta ribbon, Dimensionals, Aquapainter

Monday, November 15, 2010

Father Christmas


I layered Cherry Cobbler, Always Artichoke, Early Espresso and designs from the Deck the Halls DSP.  Behind the torn, sponged and distressed image, I layered gold Waffle Paper and silver Tinsel Trim.  


For the "peeling wallpaper" look of the main layer, I loosely adhered both sheets of Deck the Halls DSP together.  Then I tore the pieces that I wanted off, sponged the front and back edges of both layers and re-adhered.

Stamps: Good Cheer

Paper: Cherry Cobbler, Always Artichoke, Early Espresso, Deck the Halls DSP

Ink: Black, Old Olive, Always Artichoke, Riding Hood Red, Cherry Cobbler, Blush Blossom, Regal Rose, Crumb Cake, Close to Cocoa, Chocolate Chip, Early Espresso, More Mustard

Accessories: Antique brads, Silver Tinsel Trim, Gold Waffle Paper, Always Artichoke seam binding, Early Espresso 1/8" taffeta ribbon, metallic brads, Dimensionals, sponges, Aquapainter, white gel pen

Saturday, October 16, 2010

Sweet Snowman!


This is just a simple card that kind of just created itself!  It was really pale and nondescript until I noticed that the Real Red bits really needed to jump into the mix.  Other than that, I layered Garden Green, Wild Wasabi, Real Red, Blushing Bride and a design from the Candy Cane Christmas dsp. The red stipe down the center of the ribbon is the red glitter stripe from the dsp

I'm having to say that these red Glimmer Brads are my big fun new toy!  I'm already on my second box and I think that I'm going to have to stock up on these babies before the Holiday Mini no longer exists.  LOVE THEM!!

Stamps: A Cute Christmas

Paper: Garden Green, Wild Wasabi, Real Red, Blushing Bride, White, Candy Cane Christmas dsp

Ink: Black Baja Breeze, Not Quite Navy, Blushing Bride, Regal Rose, Red Red

Accessories: Big Shot, Scallop Squares Duo, Fine Galaxy Ultrafine Glitter, Glimmer Brads, Wild Wasabi stitched ribbon, Dimensionals, Aquapainter